

Meaghan Maybee
As pc/nametag's in-house Word Wizard, Meaghan creates educational content that brings people together and drives meaningful conversations in the events industry.
Hey there, conference name tag enthusiast! 👋 If you’re like us at pc/nametag, you believe every great conference deserves a killer event badge design. A well-designed name tag is a conversation starter. It helps attendees break the ice, make connections, and network. Not to mention, badges are an essential part of a solid event marketing campaign.

So, you’re ready to design an unforgettable name tag. Sounds easy, right? Well, it’s a bit easier said than done. There are many design considerations that go into creating a professional badge design.
No matter your skill level or graphic design experience, read on to find tips from our graphic designer, Rylee, on how to make name tags for a conference from scratch.
How to Create an Event Badge:
10 Steps to Making Event Badges
1. Browse name badge ideas and examples.
Before creating your conference name badge design, start by finding inspiration to guide your design. Determine what you like, what you dislike, and what elements you’d like to emulate in your own design. The most creative name tag ideas start with elements that reflect your organization and branding.
You’ll also find ideas that fit your event theme, style, or vibe. Start by browsing Pinterest and Instagram to find name tag inspiration based on what other organizations have done.
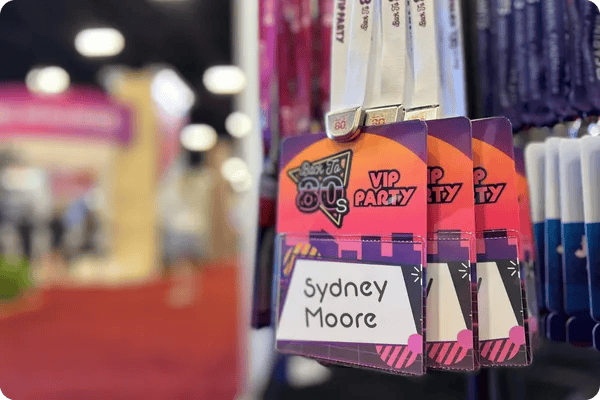
The pc/nametag team had a blast creating these "Back to the 80s" themed on-site registration badges paired with an imprinted Bevl lanyard to match! Use your badge design to bring your event theme to life.
2. Choose your event badge or name tag type.
After you’ve found design inspiration, it’s time to choose your event badge type. There are countless options on the market for you to choose from, from conference ID badges to vinyl holders and inserts.
If selecting the right style sounds confusing, consider the following list of our favorite badge types for conferences, conventions, events, and more.
Types of Custom Badges and Name Tags:
 |
Standard Event Badges: An industry go-to, event badges give that premium look and feel to any event! This is a great option for easy-to-read designs that make event branding, logos, and photos pop. Don't forget to pair your badges with a bold custom lanyard. |
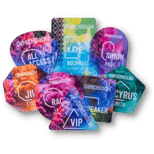 |
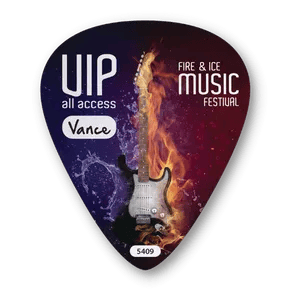
Specialty Badges: Take your event’s theme to the next level with a one-of-a-kind custom badge shape! Circle badges are popular, followed by square badges, pentagon badges, and guitar pick badges for festivals. |
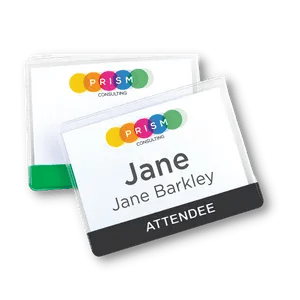 |
Vinyl Holders and Inserts: Choose vinyl holders and inserts for an economical way to blend quality looks, adaptability, and durability for your meeting. Pair it with a lanyard, or choose a magnet, pin, or clip attachment for the back. |
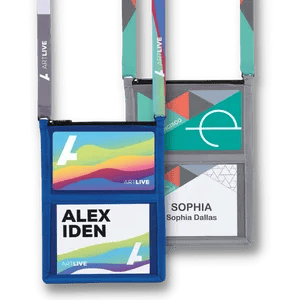 |
Neck Wallets: Stylish and functional, neck wallets are less customizable but still a creative way to display credentials. Keep their hands free of items by giving them a way to store phones, room keys, tickets, agendas, and more in a handy zipper pocket. |
 |
Adhesive Name Tags: Go big with a full-color, water-resistant satin sticky badge for your VIP event, festival, or meet-up, or go the affordable route with a classic peel-and-stick name tag with minimal waste. |
Check out our Types of Event Badges Guide to find creative ideas, design inspiration, and useful explanations on the different types of badges. Inside, you’ll also find a breakdown of the most popular sizes for event badges, name tags, IDs, and more. This is a must-read resource for any event planner!
3. Select a graphic design tool or custom badge maker.
There are countless graphic design programs you can use to design an eye-catching event badge. The option you choose comes down to your familiarity level with graphic design best practices. The best free badge makers and paid design programs include the following:
- Adobe Illustrator is one of the best software options to use, especially for seasoned graphic designers.
- Adobe Photoshop is another great tool to use and more widely available. Consider these options if you have an in-house graphic design expert who knows how to navigate these programs with ease.
- Canva and Adobe Express are great graphic design websites for beginners. Build a badge in these programs if you are new to graphic design or unfamiliar with industry best practices. We love Canva and Adobe Express because they offer templates, countless fonts, design elements, badge logos, and more to bring excitement to your name tag design.
No matter which graphic design software you use, ensure your final design is high-resolution. At pc/nametag, we recommend creating a design with a print resolution of 300 dots per square inch (DPI). We also recommend vector art files for the best results.
 |
“When designing your badge, opt for vector graphics. These are designed with curved points and lines which create a clean, infinitely scalable picture when combined with vector artwork. Vector graphics are based on mathematical formulas rather than square pixels, allowing for a crisper display.” Rylee Hubbard, Junior Graphic Designer at pc/nametag |
4. Understand bleed area, safe area, and trim lines on badges.
“Bleed,” “trim” and “safe area” are all printing industry terms you should know when designing a badge. These design features ensure your finished design looks crisp, clean, and professional:
- The bleed area is the part of the event badge that extends past the final trim size of the printed item, typically by ⅛”. For example, if your final badge is 4.25” x 6”, your image size with a bleed will be slightly larger at 4.5” x 6.25”. Your printing company will cut off the bleed area to avoid unsightly white edges on your badges.
- The safe area is the portion of the badge (inside the trim) that features critical text and logos on your badge. Everything in your safe area will be kept clear of the guillotine blades during printing and processing. This is where you’ll feature attendee names, titles, companies, logos, and variable data.
- The name tag edge is the finished size of your badge once the bleed is trimmed off. Take your name tag size into consideration, especially if you’re using on-site badge printers or vinyl name tag holders.
When designing your badge, always keep important text or artwork 1/8” away from the edges of the attachment or lanyard slot, if applicable. Printing too close to your slots may cause a portion of your design to be cut out.

A sample name tag template for a 4”x3” name tag, complete with bleed area and safe area.
5. Select your badge color using color theory.
The colors on your conference name tag design matter. Not only do they affect how attendees view your brand, but they also influence how they view your event in terms of professionality and personality.
Wondering which badge color to choose for your design? Try following your organization’s brand color guidelines to create a cohesive look. You might also use color theory to create the look and feel you’re envisioning:
- Red – Passion, energy, excitement
- Orange – Playfulness, action, fun
- Yellow – Optimism, warmth, cheerfulness
- Green – Balance, sustainability, health
- Blue – Confidence, security, trust
- Purple – Sophistication, wisdom, imagination
- Brown – Natural, simplicity, outdoor
- Black – Edgy, sophistication, luxury
- White – Timelessness, clean, softness
|
“I like using earth tones and subtle shades. Avoid dark-colored backgrounds on badges since dark colors make it difficult to read adhesive name labels for day-of-event registrants. Busy backgrounds should also be avoided since these can create eye fatigue.” Rylee Hubbard, Junior Graphic Designer at pc/nametag |
6. Choose a name tag font that’s easy to read.
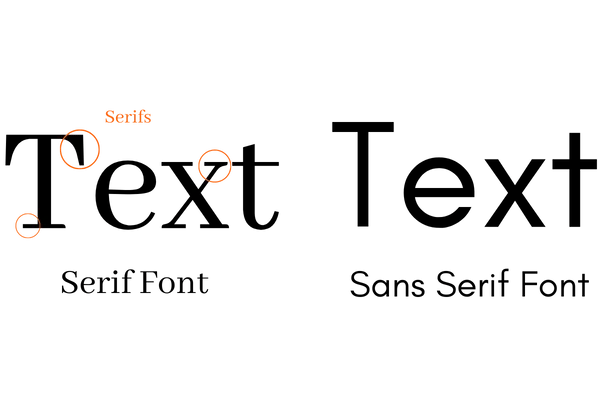
Typography plays a big role in the success of a badge design. One of the biggest mistakes you can make is choosing a font that’s difficult to read. Luckily, there are countless go-to fonts to choose from, no matter what design program you use. First, decide between a “serif” font or a “sans-serif” font:
Best Fonts for Name Tags:
- Serif fonts are typefaces that have serifs (I.e. extra “strokes” on the ends of letterforms). Times New Roman, Baskerville, and Georgia are examples of serif fonts for badges.
- Sans-serif fonts are typefaces without serifs on the ends of their letterforms. This blog post, for instance, is written in Arial, which is a common sans-serif font. Calibri, Gotham, and Helvetica are also examples of sans-serif fonts that would work great for badges.
Second, consider the “mood” of your event. Serif fonts tend to feel more traditional and elegant. Sans serif fonts feel more modern and minimalistic. Whichever you choose, ensure your font is legible from a distance. (More on that next!)
“It’s entirely possible to mix and match fonts,” Miller says. “For instance, use a sans serif font like Open Sans for attendee names, then a serif font like Times New Roman for wordy agendas on the back. Just don’t use too many fonts or you’ll run the risk of creating a distracting design.”
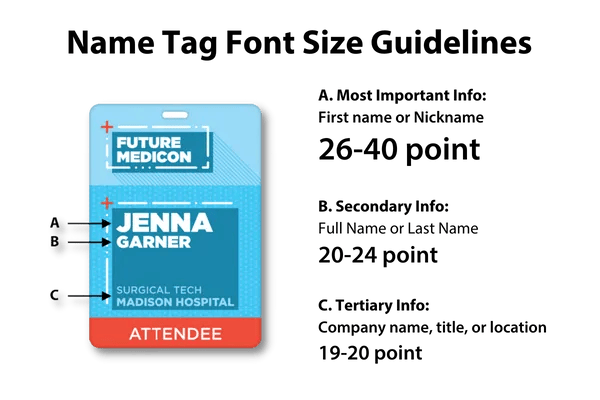
7. Make a badge with names large enough to read from a distance.
Let’s be honest. Nobody enjoys squinting to read another person’s name badge! A great rule of thumb is to print attendee names in font size 36-40 on a name tag for optimal legibility. Each following line below can be reduced by 4 points.
For example:
- Make a person’s name font size 36.
- Make a person’s job title font size 32.
- Make a person’s organization font size 28.
Experiment with font sizes and weights to see what works with your badge design. Your goal is to design a badge with names that attendees can read from ten feet away.
“Keep in mind that ‘Chathurika’ is going to appear smaller on a badge than a name like Bob,” Miller says. “Size up your badge if attendee names are becoming too difficult to read.”
8. Create a badge logo design.
Does your event have (or need) a logo? If so, make sure to incorporate it into your badge design for better brand recognition. Badge logos are one of the first images your attendees will see at your event, so make it count.
First, create a simple logo design. You want your logo to be eye-catching and meaningful, yet simple enough to print on your website, conference goodie bags, supporting materials and of course, your badges.
Next, use a design program to bring your logo to life. Canva is an excellent logo maker with hundreds of templates to edit. Change the design to feature your brand colors and voila! You have an expertly designed badge logo that’s unique to your brand.
“PNG files are the best choice for the web,” Hubbard says. “Not only will you create a clear, high-quality image, but you’ll also be able to add a transparent background. This way, your logo can be used on different colored backgrounds without any clashing."
9. Add variable data and key details to badges.
Though relatively small, event badges are filled with valuable real estate space for important information your guests need to have on hand at your event. After allocating space for attendee names and critical information on the front of your badge, have fun with the rest!
Examples of event badge variable data and supporting information include the following:
|
|
Many eventgoers appreciate printed agendas on the back. However, remember that real estate is limited, so the amount of info the agenda can contain is also limited. Choose what’s most important and applicable to your event.
“Bar codes work well when printed on the front,” Miller says. “QR codes can go on either side, depending on use. A QR code for scanning attendee information, for instance, should always go on the front. A QR code that leads to an online event agenda can be printed on the back.”
 |
“At pc/nametag, we invite event planners to send us attendee names in an Excel document with printed information formatted in separate columns. Always ensure your list is correct to ensure an error-free badge printing experience since any misspellings, capitalization errors, additional spaces, etc. on your list will show up on your tags." Nicholas Ramirez, Customer Experience Supervisor at pc/nametag |
10. Package and zip your badge art files.
File compression is an important part of the digital badge design process, especially if you’re working with a badge design printing company like pc/nametag. ZIP is a common file format that compresses one or more files together into a single location. This is an easy way to reduce your file size and make it easier to send or store. The recipient of the file can “unzip” a ZIP file after transport and use the badge design file in its original format.
Look at the end of your file name. If you see .ZIP or .zip at the end, it's a ZIP file. The icon that represents the file also changes (it should look like a folder with a zipper on the front).
Always package and zip your files when working with your badge printing organization. This is the best way to send large numbers of files over email. Head over to YouTube for tutorials on how to get started!
Free Name Tag and Conference Badge Design Templates
Designing your own name badge is fun, but it's also a lot of work. The good thing is you don't need to be a seasoned designer to prepare the perfect conference name tag.
If you’re short on time or not sure where to start, pc/nametag has 70+ DIY badge designs and ideas you can use today. This is a great starting point if you're looking for conference badge examples. The best part is our pre-designed badge templates are convenient and easy to print!
Need help creating a badge?
We get it. It can be hard, time-consuming, and downright frustrating to create your own badge from scratch, then print and assemble them yourself. Between running out of ink, printer jams, misspellings, and unseen errors, name badge preparation can leave many event professionals uttering a few choice words... 😉
The Name Badges to Go Service by pc/nametag eliminates the need to prepare your own name tags. Let our team do the heavy lifting. We'll handle every step from start to finish, from event badge printing to assembly, all the way to shipping.
Create a badge you can be proud of. Let us do the tedious part, while you get expertly designed name tags, event badges, or staff IDs—fully alphabetized and organized—shipped directly to the location of your choosing.
Submit a Comment